

Overview
The Tables API gives you programmatic access to the structured, schema-defined data tables of your workspace. A table needs a schema that describes its columns, so you create and update a table in the ROOTKey app, not through the API. A table is a container of its own, separate from a vault: vaults hold files, tables hold records. Each table provides a typed record store with integrity anchoring - every write operation is processed through the configured data processing protocol, producing a cryptographically verifiable audit trail at the record level. Tables are designed for use cases where data has a defined structure (columns, types, constraints) and where individual records must be independently verifiable - regulatory datasets, operational logs, inventory records, or any structured data requiring tamper-evidence.Key Capabilities
- Define typed schemas for structured data storage, in the ROOTKey app
- Create, update, and query records with integrity anchoring per operation
- Access full record history and version lineage
- Validate individual records against their on-chain proof
- Control access and permissions for each table individually
Endpoints
Listing tables is documented. Documentation for the other endpoints is in progress:
There is no
POST or PUT endpoint for tables: creating and updating a table happens in the ROOTKey app, because a table needs a schema.
Create a table in the app
Step-By-Step 07 · Tables and records in ROOTKey
1
Open Tables
Sign in to app.rootkey.ai and, in the left sidebar under Protect, click Database. If the organization has no tables yet, click Create your first table. Otherwise click Create Table in the top right corner.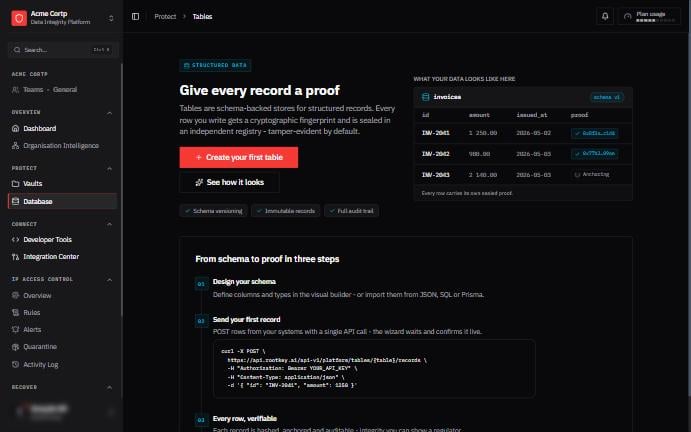
2
Name the table
Enter a Table Name and an optional Description. The preview on the right shows the table as it will be created. Click Next.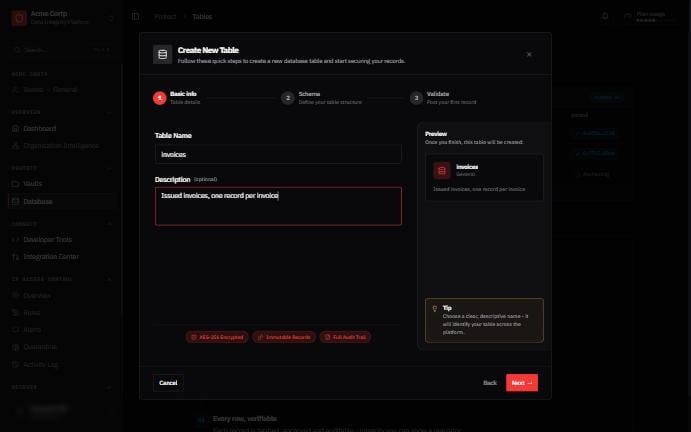
3
Define the schema
The schema lists the table’s columns. You can import the schema you already use, or build it column by column: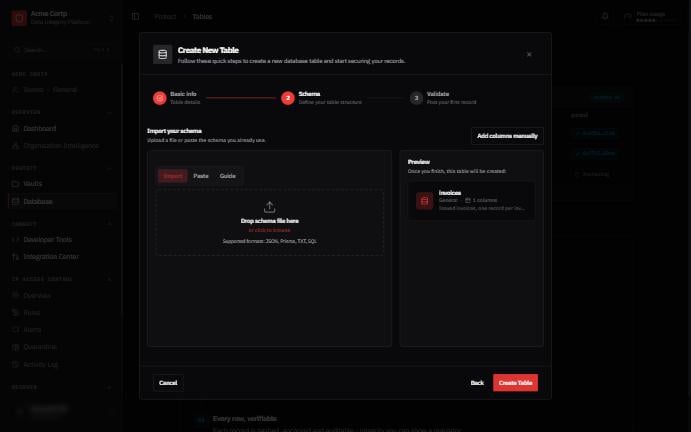
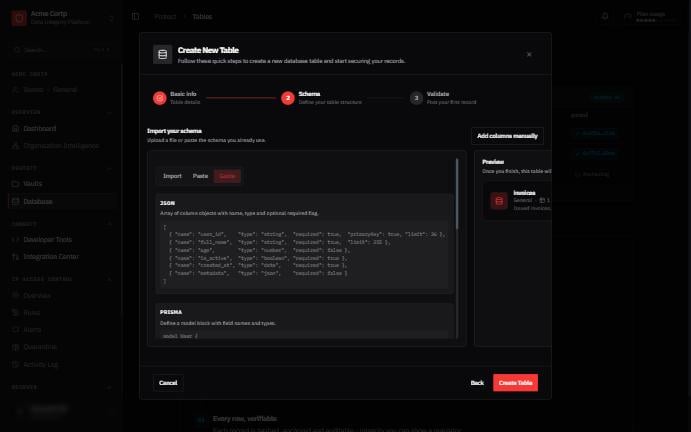
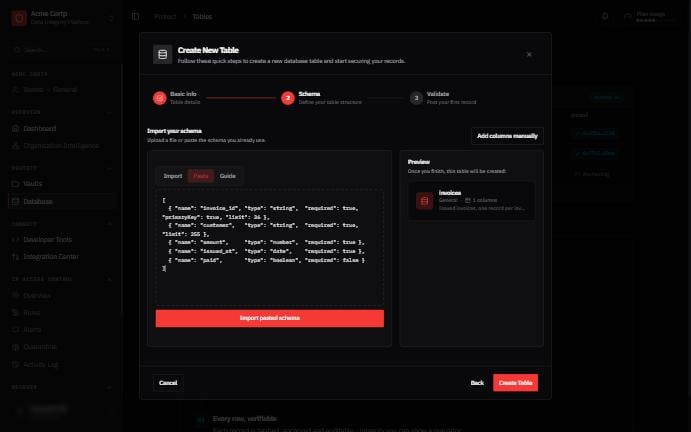
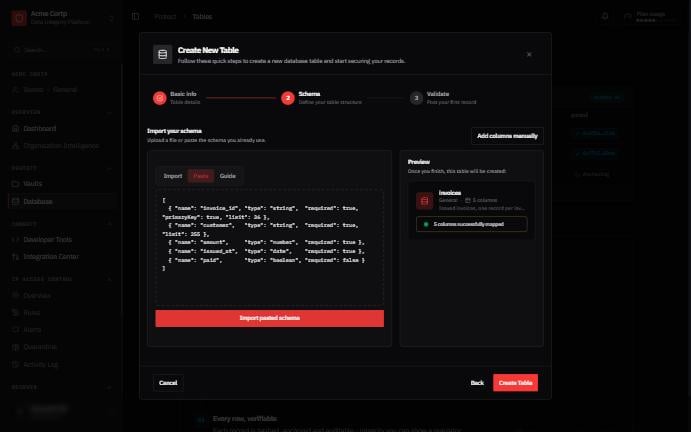
- Import: drop a schema file, or click to browse.
- Paste: paste the schema as text and click Import pasted schema.
- Add columns manually: open the visual builder (see the next step).
name, type and the optional required, primaryKey and limit), Prisma (a model block), SQL (a CREATE TABLE statement) and plain text (one name:type per line, with * marking the primary key).4
Review the columns
Click Add columns manually to see and edit each column: its name, its Type (Text, Number, Boolean, Date or JSON), the optional Char. limit for text, whether it is Required, and which column is the Primary key. Use the dashed card on the right to add a column, and Import a schema to go back to the import. When the columns are right, click Create Table.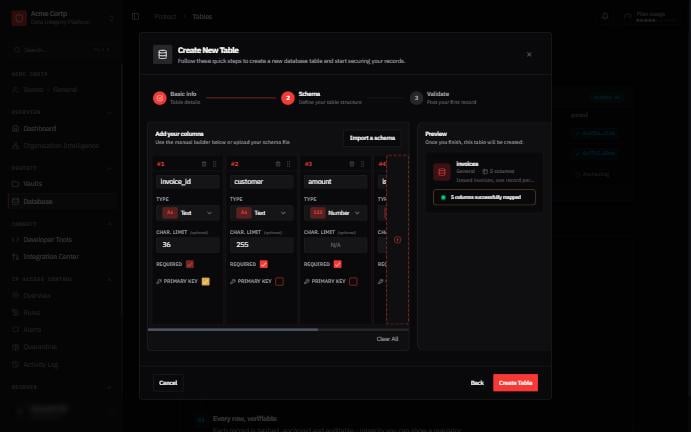
5
Send the first record
The table is created and the last step, Validate, shows a ready-made request with the table’s address, for creating, deleting, restoring and listing deleted records. Send your first record with your API key: the step waits for it and confirms the integration. You can also click Close and send it later.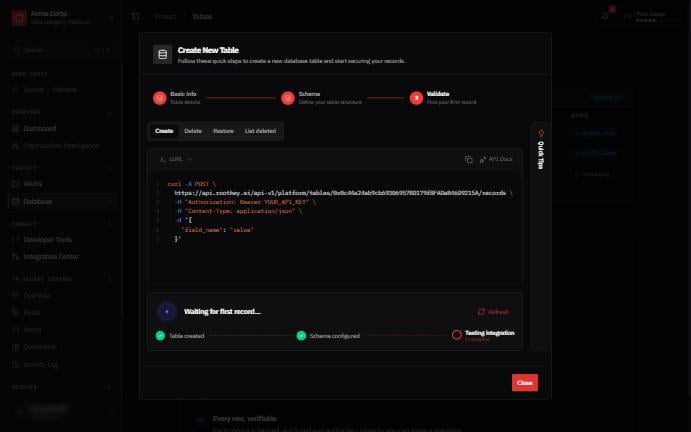
6
Find the table in the list
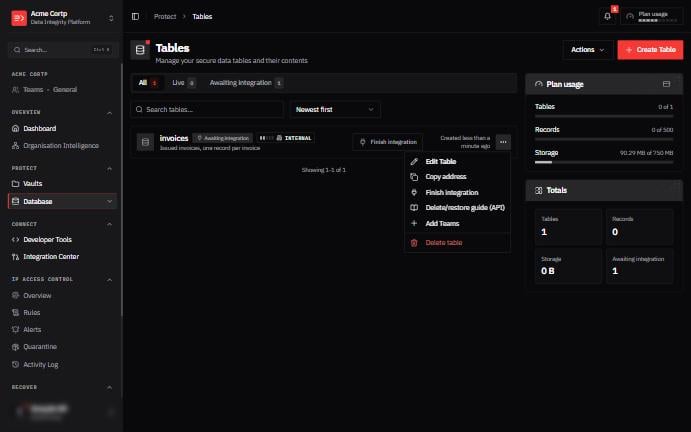
The table appears in the list. Until it receives its first record it is marked Awaiting integration, with a Finish integration button that reopens the request.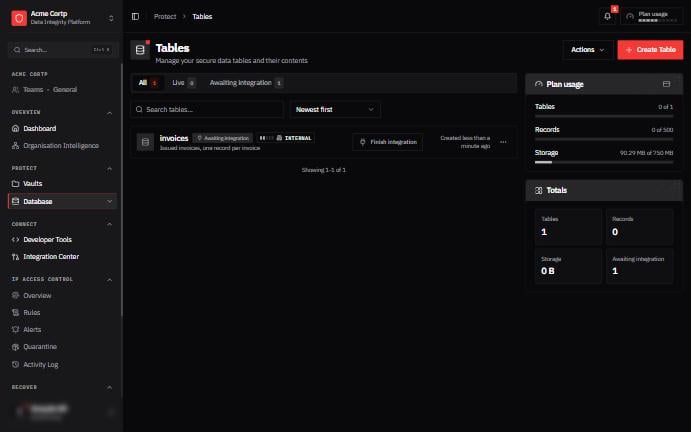
Related
- Records API - manage individual records within a table
- Vaults - a separate concept: vaults store files, tables store records
- Files - for unstructured document management